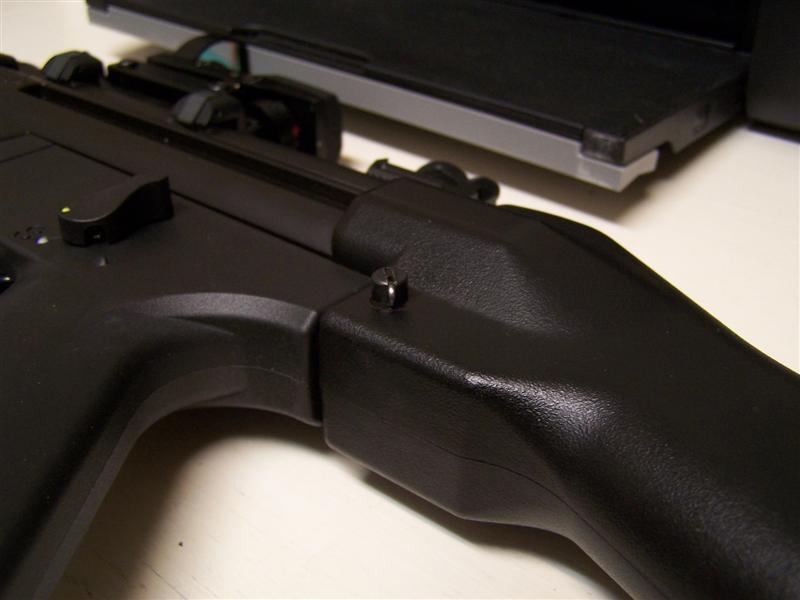
Installing the large HK pin in your GSG 5 Carbine
First, the small pins drop right in and fit perfectly. I struggled with this process of installing the large pin a bit and assume that most GSG lovers are not master machinists so I think a little tutorial is in order. The drill bit I used is size 9/32. Although it looked a tiny bit oversized, when I drilled test holes (not on my carbine) it made a hole that the large pin would go through snugly and without binding.
I should mention that someone said that you could simply ream out the opening on the ejection port side until a small pin would sit flush and it locks nicely. I believe he just used the flat head screwdriver that came with the carbine to accomplish this. No drilling necessary. You may want to try this before you go to the extremes below. I can't say yay or nay as I didn't try it. My standard kit includes 3 small pins and 1 large one.
A happy customer writes:
Hey George,
Received the push pins today and they work great.
I just wanted to let you know that you can use the small push pin with the
factory rear stock with only a minor modifications.
The right side hole of the butt stock has to be enlarged using a 15/64th drill
bit.
I went ahead and slid on the stock first and drop the bit in from the left so I
knew it would be lined up.
Tapped on the drill trigger and it was through instantly.
To get the pin to push through far enough from the left side I enlarged the
counter bore ever so slightly using the shaft a drill bit and some 600 grit sand
paper.
I only probably removed a couple thousands to get the pin to go all the way to
the bottom of the existing counter bore.
To install the large HK pin:
1. Remove your buttstock and set aside for now.
2. Being very careful to keep the bit straight drill through the existing hole in the trigger group housing. It's quite soft and will zip straight through. It is easy to drift away from a true straight line so really go slow and try to stay straight. A drill press would be great here. You can touch up the edges of the openings with a little sandpaper if desired.
3. Now to the buttstock. You want these holes to be enlarged just enough to allow the pin through and it won't take much. You're only removing something like .002 inches of material. There is not much supporting plastic here so I think the best approach would be to wrap a piece of sandpaper around a slightly undersize drill bit and turn it by hand to remove just a tiny bit of material at a time until the pin will just squeeze through. My pin goes in from the ejection port side so I focused on that hole first.
4. The opening on the other side has even less supporting material so be extra careful here. It's much easier to remove material than it is to put it back. Again just remove enough for the pin to squeak through and you're done. If it seems too snug that's good. It will loosen with time. Don't keep going until you say "uh oh".
5. Optional: I found that the large pin was not supported enough on the spring side for my taste. Though it was secure, seeing a picture of an HK stock made me want to duplicate the look. So I ran down to Lowes and bought some JB Weld (not fast setting). After thoroughly cleaning inside and out around the opening I roughed it up a little bit inside and out and stretched black electrician's tape over the exterior side. I burnished it down completely. Don't want any epoxy to leak out here. I mixed up a batch and added a little Brownells epoxy black (an awful black powder that will get everywhere if you're not careful) to make it match the stock and carefully filled in the hole from the inside. I went overboard on purpose and spread it around inside as well to give it more locking area. Waited the requisite 16 hours and removed the tape. Looks good so far. Now I drilled the hole out starting with a 1/8 bit and gradually stepping up to the 9/32. It worked! Looks great too. Don't try this at home kids - unless you're very brave. The factory opening is fine and quite secure if you don't overdue the re-sizing. I just can't stop tinkering.
