GSG 5 Replacement Screw Set
Installation Tips
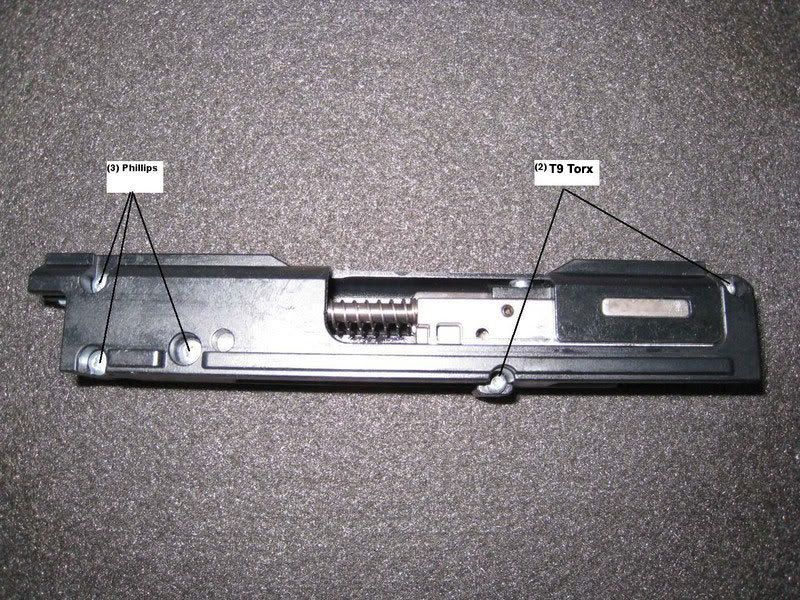
Notice: Be sure to crank the bolt jacket screws in and out a few times as you tighten them to get get them to seat properly. They are very small and easily damaged.
1. Make sure you have every piece. Compare the enclosed list with the parts. Match each screw with it's nut. Let me know if something is missing and I'll send a replacement. Work on a clear table top - the parts are small and will be hard to find in that shag carpet. Yes, I will send a free replacement if you lose one.
2. The nuts can be difficult to get into their openings. Try this: Start each
nut on it's corresponding screw a turn or two and set it in the hole. Then
remove the screw and insert it on the opposite side.
3. Make sure the nut is bottomed out in it's opening when the screw makes
contact with it's threads. Otherwise the screw can be tight and the nut still be
loose. Use a pencil (eraser side) to hold them in while you get the screw
started.
4. Get the screw almost tight and then back it out half a turn and tighten it
again. Do this a couple of times - you'll notice it turns just little tighter
each time. This is especially important on the button cap bolt jacket screws.
5. Don't overdo it - these screws are much stronger than the originals and much
more torque can be applied. Don't strip something using your herculean strength
and don't send me a nasty note if you do. This has already happened. Don't
overdo it!
6. These screws will stay tight, but should still be occasionally checked. Especially the bolt jacket screws. One of these is easily accessible when the bolt assembly is removed for cleaning and should be a good indicator of the state of the other two. If it's even a little loose, disassemble the bolt assembly and re-tighten all three. These are the most crucial screws on your carbine to keep tight. You may wish to add a small lock washer to these. I don't have lock washers on mine.

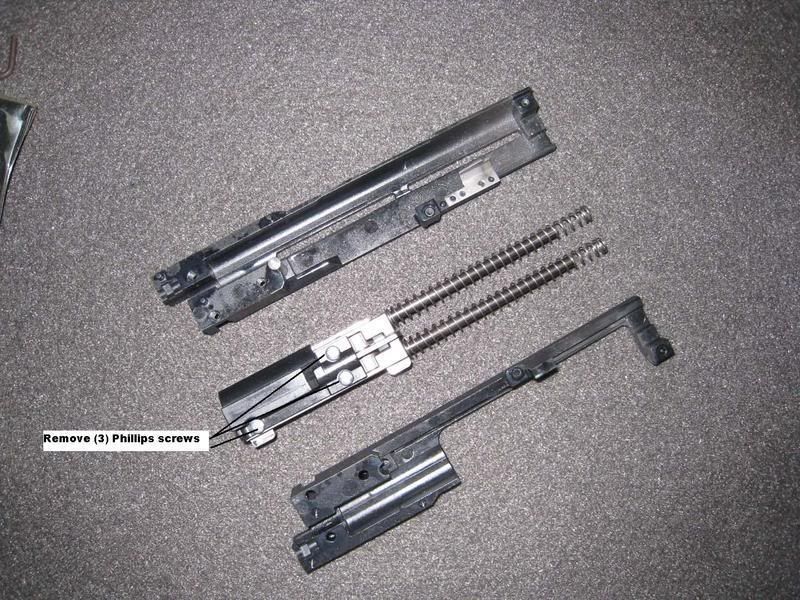
Remove top cover of bolt. The firing pin spring is captured underneath this
cover. It will not be removable at this point but keep you hand over it just in
case.
Also take note when removing the 2 main springs. There is a narrow end and a
wider end to the springs. The narrow end goes in and touches the breech-housing.
If you put them on backwards the springs will bind in the breech housing.

These are the bolt jacket screws.